Organize or group your buttons into categories
You can create a Page or Pages to group your buttons in a category, such as Pro Shop and Restaurant. In this 3.100 version of QSB creation, you MUST create at least one Page. And under the Pages, you can create subcategories or submenus to further group your buttons for ease of use.
The following offers the details on each method:
Using Pages
You create a new page that will hold buttons under it for the purpose of grouping or organizing your items, for example, you might want to create an F&B page to contain your restaurant items and a Golf page for your pro shop sales. And then you can create other page items below those pages to further sort the items in order to make them easier to find and use.
Example: A Page would be higher level than all submenus, like the Grab and Go menu; think of it as the home page or starting page. Then the menu-type buttons on that page might be Snacks, Pop, Gum. Those menu-type buttons would have that Menu Item box checked so that when you click one of those, like SNACKS, during a sale, it produces a page full of buttons like Hot Cheetos, Funyuns and the like.
-
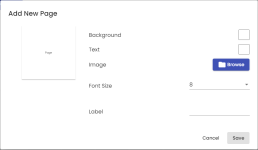
Select New under Pages on the far right. The Add New Page dialog box displays.
-
To design the look of the Page button, do one or more of the following:
-
Background - Select the box to the right to add a background color. A color palette displays where you can click the desired color
-
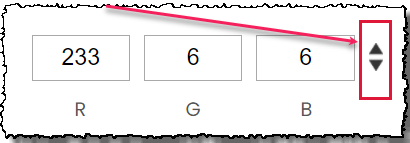
Note: You have the option to enter the Hex code or RBG code or hue, saturation, and lightness by using the up and down arrows:

-
-
Text - Select the box to the right to add a text color.
-
Image - Select the Browse button to the right of the word Image, and then navigate your computer to select an image for the button. Note: Although you are free to add an image and text together, the results may be unreadable.
-
Font Size - Select the down arrow and then select the size of the text for your button.
-
Label - Select the field and type the name you want to appear on your page button. You can use only so many characters before it becomes unreadable - experiment with that number as needed.
-
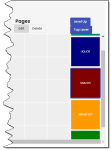
When you are finished designing your page button, select Save. The new Page button displays your design to the far-right.
Using Submenus
Creating submenus from Quick Sale buttons
Just like creating a Page that is a first-level option only, you can organize more items under the submenu Quick Sale buttons as follows:
-
If this submenu is under a page or a submenu, select that first then select Add Sub. The submenu displays or is created. Note: The Add Sub both adds and navigates you to a previously created submenu.
-
Select the position or the square below the Button area. The square highlights.
-
Do one of the following as needed:
-
Select the Add button located under the Buttons section to create a button under the submenu. The Add New Button screen displays. (See the Adding Quick Sale buttons topic for more details.)
-
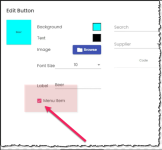
To create another submenu button, select the Add Sub button, select an empty square, select Add, and repeat the steps above but check the Menu Item box and select Save.
-
Repeat this until you are satisfied with your submenus that will contain your buttons.
|
Example: You can have buttons and submenus on the same level, for example, you have created a Page with a submenu called Drinks. In Drinks, you have a few QSB such as Red Bull and Tang. Under that Drinks, you create another submenu called Alcoholic and buttons called Non-Alcoholic for sodas and other drinks. |
-
In the Label field, type in the name for this submenu, like Sides or Clubs.
-
Design the button as needed. (See the To format a Quick Sale button topic for more help)
-
Click Save.
-
To add a submenu or button below this, select the submenu you just created and click Add Sub. A blank grid displays unless this was already created as a submenu with buttons below it, then those buttons display.
-
Repeat the steps for either creating submenus or buttons above to continue the process.
Note: You cannot create a Page under submenus.
Navigating Submenus and Pages
You can move back up through the submenus of buttons and between Pages using the navigation buttons located in the top-right portion of the page. (See the Navigation topic for more help)
Page navigation
At any point in time during your editing and creating, you can move from one Page to another by selecting the Page button desired to the right granted that you have already created these Pages.
Level navigation
If you need to move from a submenu level up to another level within a Page, you can select the Level Up button located in the upper right corner. You can continue clicking that until you are at the top level as needed.
Top Level navigation
If you need to get to the upper level of the Page that you are editing, click the Top Level button and you’ll be back at the starting page of buttons.


